With the EOS (End of Support) for Windows 10 fast approaching on October 14, 2025, you should already be using Windows 11. But if you’re still hesitating and want to try it out first before committing then this walk-through is for you. Using the Microsoft software site you can download the Windows 11 ISO file free and install it as a virtual machine using VMware Workstation Pro 17 which also happens to be free for personal use. Even if you’re already onboard with Windows 11 you can still benefit from installing a new instance of it in a virtual machine.
Windows 11 has incorporated a few new features that are causing numerous users confusion and frustration. Three of the new features causing consternation include forcing users to provide an email address during installation, forcing users to use a Pin number instead of a password to login, and putting the Start menu and task bar in the middle of the screen instead of the left side where it’s been for decades. In this blog post I will show you how to work around these frustrations.
Downloading and Installing VMware Workstation Pro 17
VMware Workstation Pro 17 is now free for personal use which is great news since it used to cost hundreds of dollars to license. Before getting started, you will first need to create a free account on the VMware website and then you can download the program.

Once you have downloaded the installer, run it and follow the installation wizard. I usually accept all the default settings, but you can change the installation path if you want. The installation process is relatively quick. Once you have finished installing, make sure to restart your computer before you try to create any virtual machines. This restart ensures all VMware components are properly initialized.
When setting up VMware Workstation Pro, you will need to create an encryption password. This password is stored locally on your host computer and helps secure your virtual machines.
For hardware customization, you can specify the amount of disk space and RAM to be allocated to your virtual machines. I would suggest changing these settings depending on your computer’s capabilities and the requirements of your planned virtual machines.
After installation, you should absolutely install VMware Tools within your virtual machines. This essential component improves usability by:
- Making it easier to click in and out of the VM window
- Enabling connection to local directories on your host machine
- Simplifying file transfers between host and virtual machines
VMware Workstation Pro 17 is an excellent platform for testing operating systems like Windows 11 without affecting your main system configuration.
Obtaining the Windows 11 ISO File
Getting the Windows 11 installation file is a straight forward process. Start by going to Microsoft’s website that provides Windows software downloads.
Select the 64-bit ISO option from the list of available choices on the download page. Select your preferred language by using the dropdown menu.
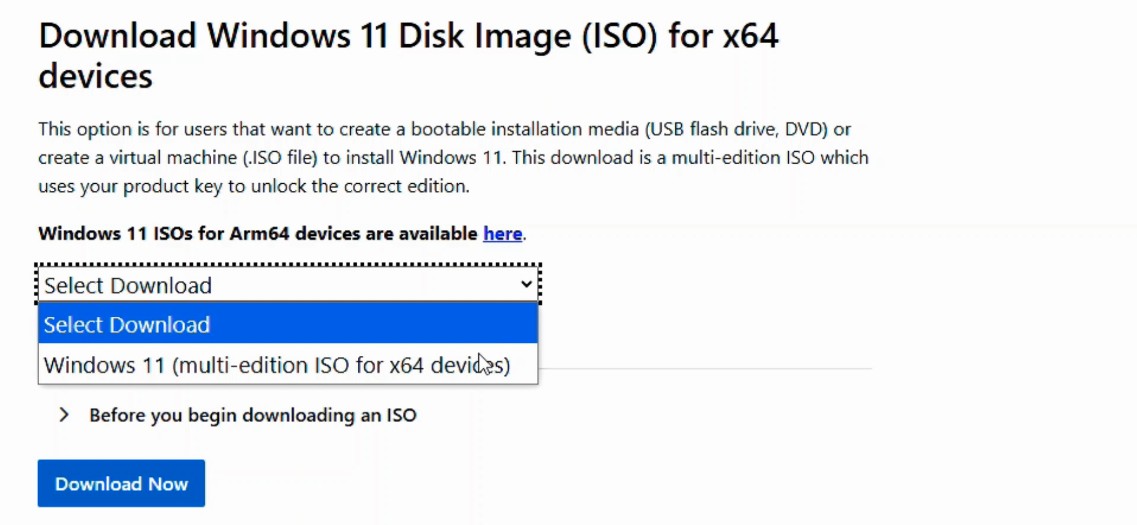
Select your language preferences before clicking the download button to start the process. The Windows 11 ISO file requires approximately 6 GB of storage space and download time depends on your internet connection speed.
Setting Up Your Virtual Machine
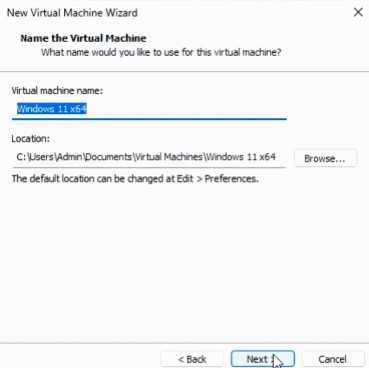
When creating a new virtual machine in VMware Workstation Pro 17, the process begins with launching the New Virtual Machine Wizard. For the media source properties, select the Windows 11 ISO file that was previously downloaded from Microsoft’s software download page.
Storage Allocation
Make sure you have enough disk space allocated to your virtual machine. The wizard lets you choose exactly how much space to assign to the VM. You can always add more space later as needed but if you go that route you will then in turn have to reboot the machine and then use Windows 11’s disk management tool to expand the drive within the operating system. So to avoid this headache in the future just add more space than you think you’ll need.
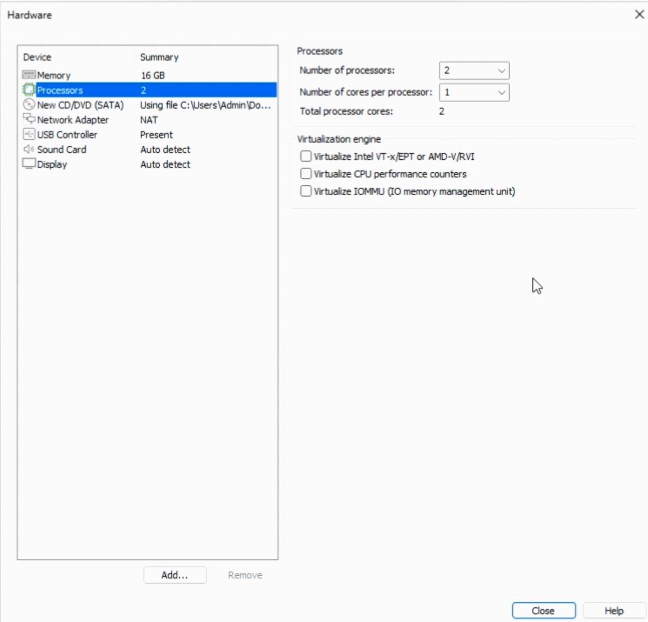
Hardware Configuration Options
The most important setting here is RAM allocation – providing enough memory will result in a smooth running Windows 11 virtual machine. It goes without saying that what you choose here will depend on your host computer’s physical resources. Running Windows 11 in a virtual machine will see some performance degradation. Allocate as much RAM as you can without hurting the performance of your host system. Other hardware settings like processor cores and network adapter configuration can also be adjusted here before starting the VM installation process.
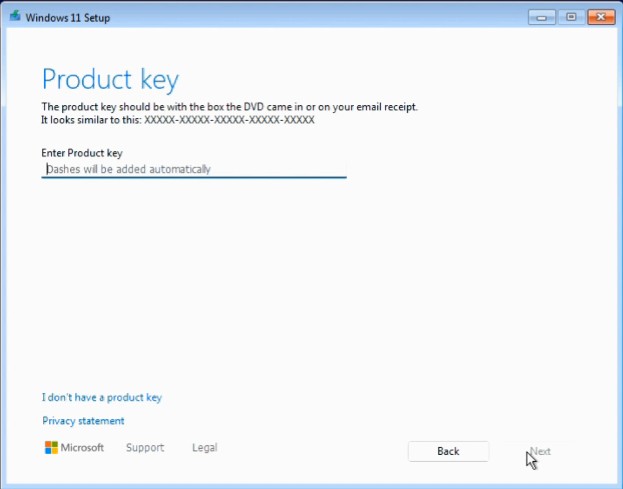
Installing Windows 11 in Virtual Machine
If you’ve ever installed Windows before you essentially know what to expect. You need to enter your product key or select “I don’t have a product key” to move forward. The installation process will continue without a valid license when you select this option but you must activate Windows later with a valid license.
Follow the default installation wizard settings during the installation process. The Windows setup process will lead you through multiple screens of basic configuration options. Users who do not require special settings should use the default installation options.
Configuring Virtual Storage Space
The installation process will ask you to determine the Windows installation location. Select “disk zero unallocated space” because this option points to the virtual hard drive that you established during VM setup.
As mentioned earlier, the available space for installation is restricted to the amount you specified in the virtual machine properties. You will need to perform the following steps if you require extra space at a later time:
- Add more space in the VM properties
- Reboot the virtual machine
- Use Windows Disk Management to expand the drive
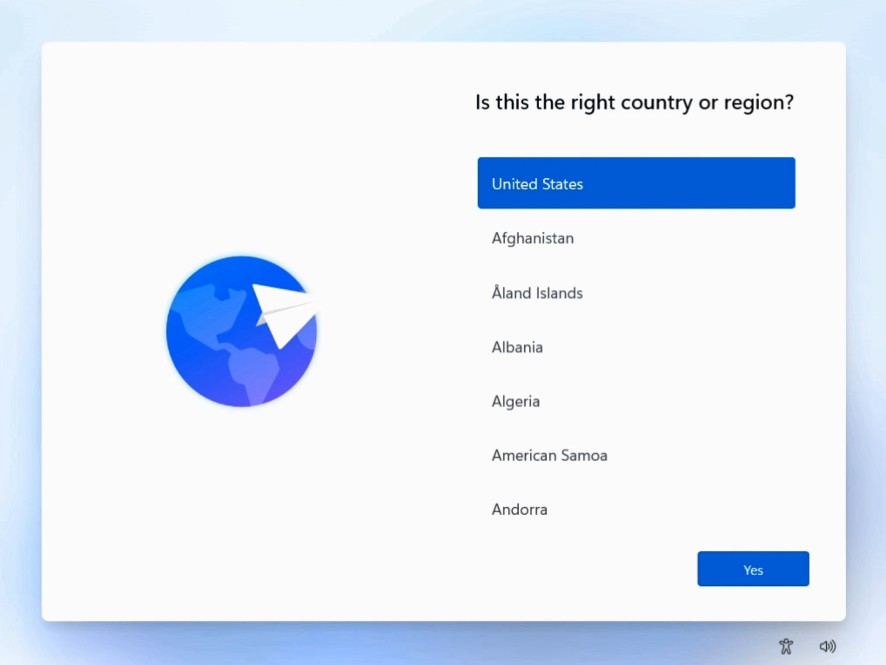
Customizing Regional and Personal Settings
The installation requires you to choose your regional settings according to your geographical location. The regional settings determine which language you want to use together with your time display format and keyboard input preferences.
The install wizard will prompt you for a name for your instance of Windows 11. It will generate an automatic name if you choose to skip this step. And don’t forget you can always rename your instance of Windows after the installation completes.
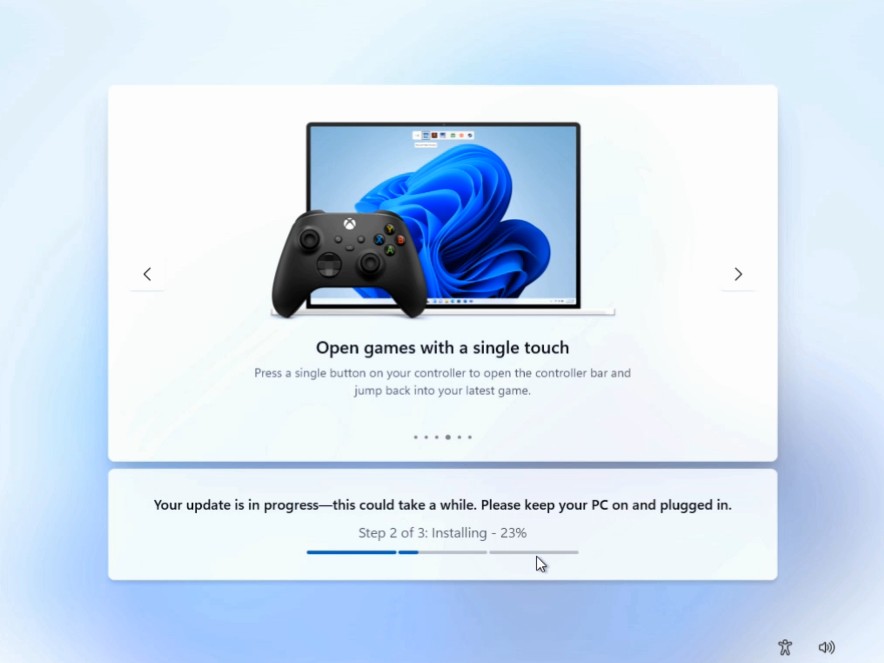
Managing Updates and Security Features
In my experience, the slowest part of the install process was during the updates. Windows 11 will download and install current updates and security patches. The download speed depends on your internet connection strength and system resource availability. On my virtual machine this part was at least an hour of just waiting.
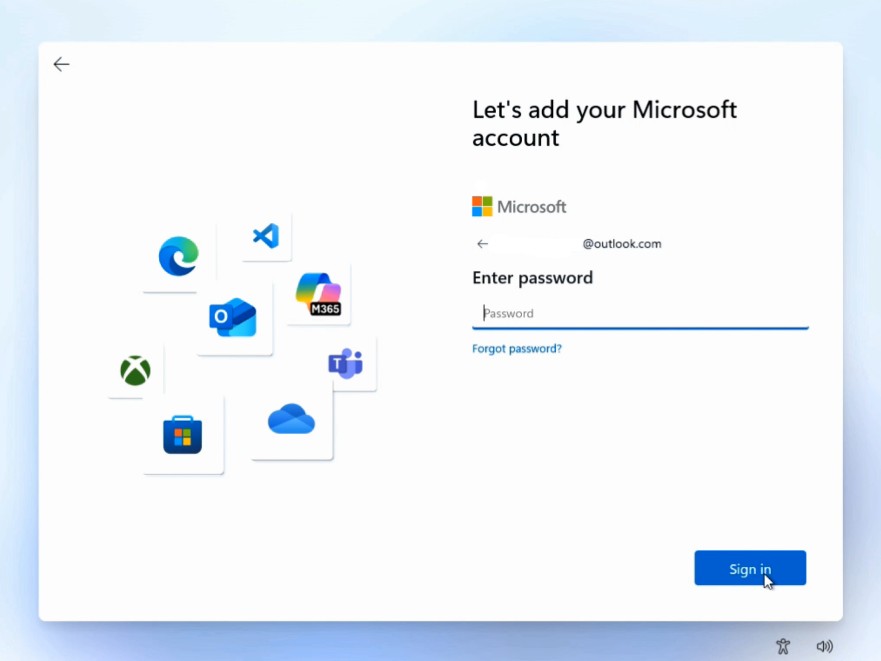
As mentioned earlier, you are now required to provide an active Microsoft account to complete the Windows 11 installation. It does not matter if you have a new computer or a virtual machine like this one. Historically you could get around this step by turning off wi-fi, or not being able to login to the email account, or using Shift-F10 to execute Windows commands, but that is no longer possible. Initially you will have to login with a valid Microsoft account. However, keep reading because I will demonstrate how to switch Windows 11 back to a local account and password.
Windows Hello Pin
Once you successfully login with the Microsoft email address you will be immediately prompted to create a pin number. This is the Windows Hello Pin. The Windows Hello Pin functions as a personalized authentication method which according to Microsoft provides better security than passwords when accessing Windows 11 devices. The Windows 11 installation process now requires users to set up this feature because Microsoft believes it provides stronger security than standard passwords.
The advantages of this system are easy to understand because your PIN stays on your computer instead of Microsoft servers which reduces hacker access. The system includes built-in brute force protection and your PIN stays on your device at all times. The security benefits of this method surpass complex passwords because it provides easier memorability.
However, the Windows Hello Pin has also created a lot of frustration among users. Again this is a mandatory step now integrated in the Windows 11 installation process. This is another classic example of Microsoft thinks they know better than I do about what I want and what I need. The majority of of people I’ve talked to consider this requirement as an unwanted additional step in their login procedure. Furthermore, the implementation of this feature creates security concerns for some users because they typically choose basic 4-digit PINs which they can remember easily and are more vulnerable to guessing than complex passwords.
| Pros of Windows Hello PIN | Cons of Windows Hello PIN |
|---|---|
|
|
Customizing Your Privacy Options
The Windows 11 setup process includes multiple privacy settings which determine the amount of data Microsoft will collect. It is advisable to review each privacy option individually instead of using the default settings.
For enhanced privacy:
- Disable targeted advertising
- Limit diagnostic data collection
- Restrict app permission access
- Turn off location tracking
Uncheck all of these options to achieve better privacy protection.
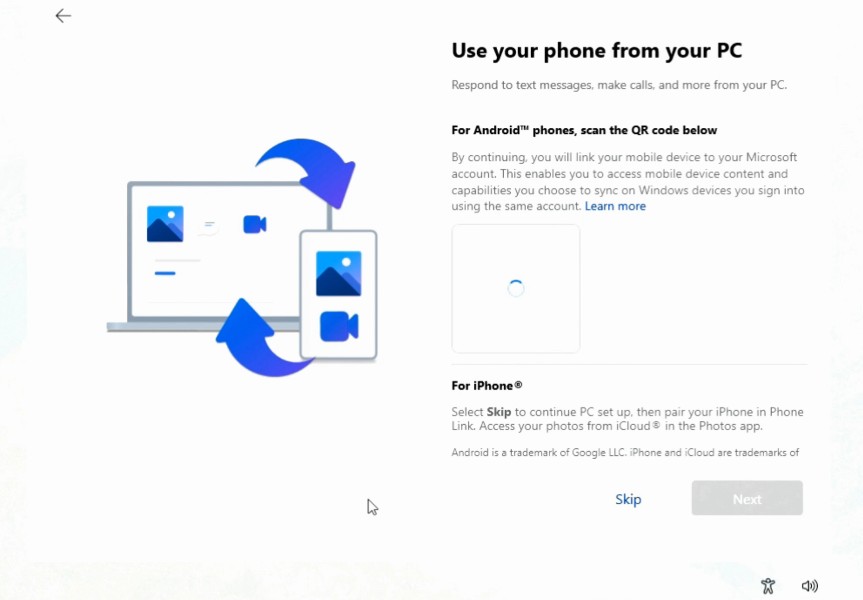
Connect Your Phone!
Wait, what? Yes, the Windows 11 install now tries to get you to connect your phone. The Phone Link app (formerly Your Phone) operates as a standard Windows 11 setup feature to provide this functionality. Microsoft thinks you want to view phone notifications and messages and access photos and select phone apps from your computer. In a word: no. OK, 2 words: no way. Please stop it. I’ll look at my phone if I want to see phone notifications. Fortunately, the install wizard allows you to bypass this step.
Upsells for Office
The remaining steps are upsells for Microsoft Office. Again, no thanks.
The desktop
With the Windows 11 installation wizard complete you’ll finally arrive at the desktop. Don’t panic. You didn’t do anything wrong. One of Microsoft’s new features was to realign the Start menu and task bar to the center of the screen despite multiple decades of having it on the left side of the screen. I would love to see video of the the focus group or strategy meeting that thought this was the killer feature Windows 11 really needed.
Reconfiguring the Start Menu with Start 11
Well like so many millions of users of users online have shared I am not a fan of the Start menu in the middle of the screen. The default Windows 11 start menu leaves much to be desired, but fortunately, there’s an excellent solution called Start 11 from Stardock.com. I have been using Stardock’s Start menu since Windows 8. The good news is that Start 11 can be installed on both Windows 10 and Windows 11. One license typically allows you to install it on 5 devices.

Start 11 enables users to control every aspect of Windows 11 start menu and taskbar functionality. I started using this tool after the problematic Windows 8 start menu appeared and it has been my go-to tool ever since. The software provides adaptable licensing choices because users can select from individual device licenses or multiple device licenses.
Start 11 stands out because it provides users with multiple menu styles including Windows 7 and Windows 10. I always use the Windows 7 style.
The installation process is straightforward:
- You can download Start 11 from Stardock.com.
- Run the installer
- Choose your preferred start menu style.
- Customize settings to your liking.
Start 11 presents users with multiple menu styles to select from including:
- Windows 7 style (my personal favorite)
- Enhancements to the Windows 11 style.
- Windows 10 style
- Several other customizable options
The application provides users with options to modify menu transparency levels as well as icon dimensions and complete visual appearance. You can also configure the taskbar behavior to match your workflow preferences.
Start 11 stands as a crucial tool for anyone who needs productive navigation on their new Windows 11 system. The investment provides excellent value because it enhances your ability to control your daily computing tasks.

Installing and Configuring VMware Tools
After successfully installing Windows 11 in the virtual machine, the next essential step is to install VMware Tools. This component significantly enhances the virtual machine experience by improving functionality between the host and guest systems. The installation process is straightforward and takes only a few minutes to complete. Once installed, I notice immediate improvements in display resolution and overall performance of the virtual machine.
To begin the installation process, I select the VMware Tools option from the VM menu. This installation makes navigating between the virtual machine and my host computer much more seamless, eliminating the need to press keyboard combinations to release mouse control.
One of the most valuable features of VMware Tools is the ability to establish shared folders. This creates a direct connection between a directory on my host machine and the virtual machine, making file transfers between systems quick and convenient.
For those who regularly work with virtual machines, installing VMware Tools should be considered a mandatory step rather than optional. The enhanced functionality it provides makes working within the virtual environment significantly more productive.
Converting Your Microsoft Account to a Local Account
Windows Hello, good bye! If you’ve read this far, then it’s time switch Windows 11 from logging in with an email address and pin number to using a local user account and password.
Switching to Local User Credentials
You can switch to a local account from a Microsoft account in Windows 11 by going to Accounts in the Control Panel .
- Navigate to the “Account Settings” area then choose the “Sign in with a local account instead” option.
- Enter your current PIN when prompted to authenticate your identity.
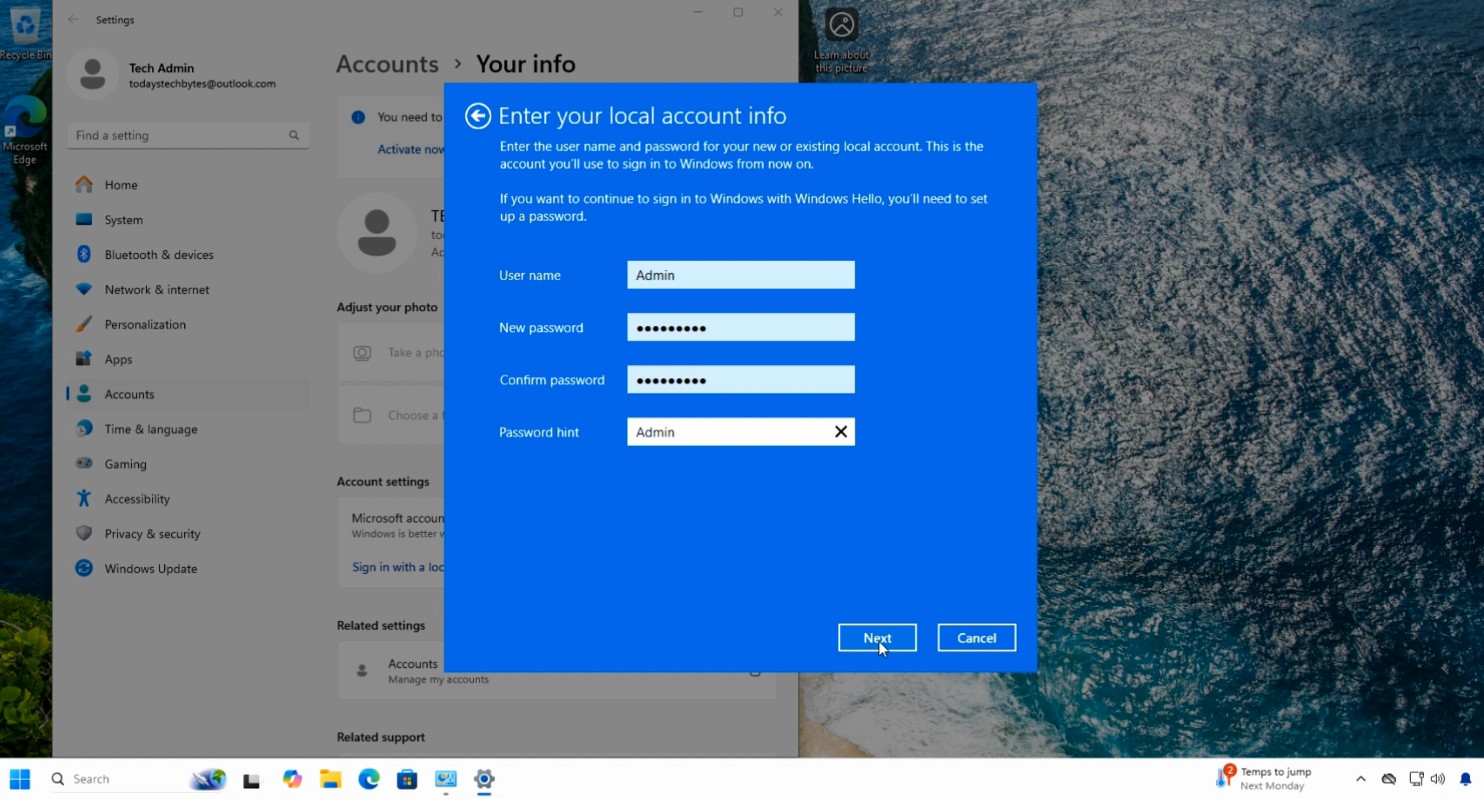
- Enter a username and then a password.
- Click the Sign-out button and then Microsoft email address will be replaced by these new credentials.
- Login with your new username.
Windows 11 will now allow you to login with the username but for the time being it will still force you to use the Hello Windows Pin instead of the password.
Remove the Hello Windows PIN
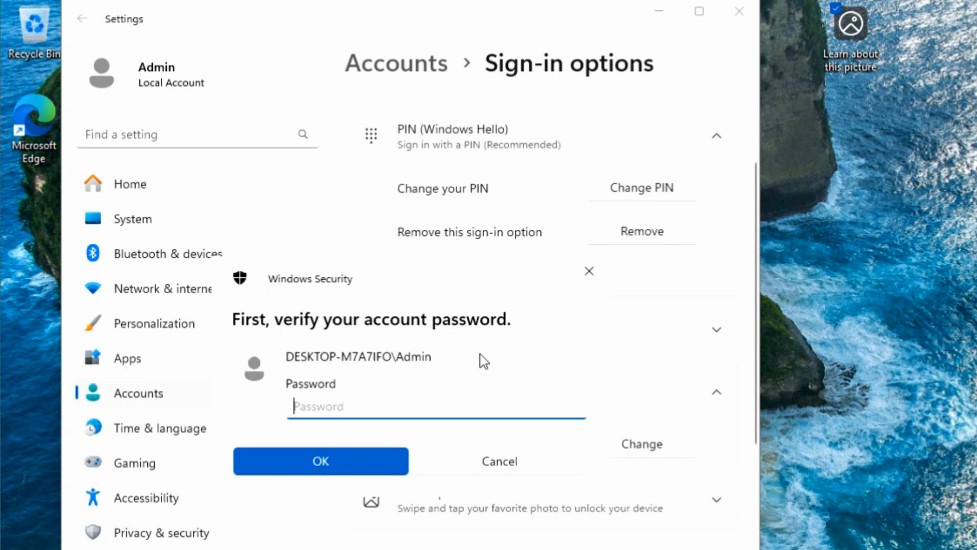
Once again go to the Accounts section in Control Panel and then click on “Sign-in options“.
- Click the “Setup” button from the Windows Hello PIN section. You’ll need to authenticate with your password first.
- After verification, click the “Remove” button then confirm the action by clicking “Remove” once more. You must enter your password once more to finish this process.
After these modifications Windows 11 will now allow you to login using a local userid and password without requiring additional verification. Hurray!
Enhancing Privacy with Brave Browser
Every Windows computer or virtual machine I use has Brave browser installed. I love it because it provides better privacy protection than typical browsers. Brave includes integrated privacy tools which make it unnecessary to install separate extensions such as Adblock Plus or Ghostery. The browser implements privacy features as fundamental components of its core functionality. The browser stops all trackers and intrusive advertisements and fingerprinting attempts as part of its automatic security features.
Setting up Brave is straightforward:
- Download from the official website
- Run the installer
- Follow the simple setup wizard
Brave provides users with multiple essential privacy features including ad blocking and tracker prevention and fingerprinting protection and HTTPS upgrading. When compared to other browsers, Brave significantly reduces the data collected about your browsing habits. And the browser delivers faster speeds because it prevents trackers and ads from loading which normally cause delays in page loading. One nice undocumented feature is that you can watch youtube videos without commercials with Brave. Check it out.
In Summary
To recap, Installing Windows 11 as a virtual machine using VMware Workstation Pro 17 is a straight forward process and both are free to download and install. Windows 11 has several controversial new features causing users headaches but they don’t have if you follow the work arounds I shared. Start 11 is a fantastic product that lets you take control of the Windows Start menu and enhance it, in fact. The Brave web browser offers unparalleled privacy protection out of the box without any extra plugins. Thanks for reading!
