Do you have a pile of old hard drives on a closet shelf? Repurpose them as redundant storage with Windows 11 Storage Spaces. Storage Spaces enables users to transform their unused hard drives into functional external storage devices using software RAID. Even internal drives with the help of tool-free enclosures can be reused as a flexible storage pool operating similarly to RAID without requiring expensive new equipment. In addition to saving money, using the old drives has the added benefit of reducing electronic waste from entering landfills which which helps the environment.

The Storage Spaces feature in Windows 11 enables users to mix different drive types including SATA and M.2 NVMe and USB to create a protected storage system through mirroring or parity. The feature operates without requiring additional software or technical expertise and is accessible in the Windows Control Panel.
Storage Spaces enables users to achieve more than storage expansion through drive repurposing. The system provides enhanced backup management and maximizes your existing hardware investment while minimizing electronic waste.
Key Takeaways
- Windows 11 Storage Spaces combines internal and external drives into new storage unit
- With Tool-free enclosures you can reuse internal SATA or NVMe drives into USB storage
- Save money and reduce electronic waste using by repurposing old hard drives
Getting Started With Windows 11 Storage Spaces
Storage Spaces in Windows 11 offers desktop RAID functionality by combining several physical drives into a single storage pool with built-in redundancy. To set it up, you’ll pick your drives, choose a resiliency type, and configure a new virtual drive for data protection.

- CONVENIENCE: 100% Tool-Free, quickly install and remove SSDs without any tools.
- DESIGN: Ultra-slim Aluminum case with ABS frame. Sleek, Durable, and Convenient. Portable yet durable, ideal for traveling.
- COMPATIBILITY: M.2 form factor compatible with both SATA and NVME in sizes: 2242/2260/2280.
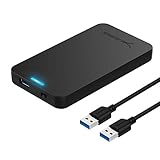
- Tool free design, easy to install,Transfer Rates Up to 480 Mbps when connected to a USB 2.0 port,Transfer Rates Up to 5 Gbps when connected to a USB 3.0 port.
- Suitable for 2.5” SATA/SSD;Supports Standard Notebook 2.5″ SATA and SATA II Hard drives
- Optimized for SSD, Supports UASP SATA III,Backwards-Compatible with USB 2.0 or 1.1
What Is Desktop RAID and Windows Storage Spaces?
RAID (Redundant Array of Independent Disks) is data storage virtualization technology that combines multiple hard drives to guard against data loss. Windows 11 Storage Spaces brings desktop RAID to PCs without specialized hardware like a NAS device.
You can build a storage pool from whatever drives you have available including internal SATA, external USB, even SSDs. Once the hard drives are connected to your PC you create a virtual drive called a storage space, and Windows will spread your data across the physical disks automatically.
Storage Spaces is more flexible than old-school RAID. You can mix and match drive types, sizes, and connections in the same storage pool. Everything is managed right inside Windows 11—no extra tools required. However it should be noted that any existing data on the drives will be erased when creating the new virtual drive.
| RAID Feature | Traditional RAID | Windows 11 Storage Spaces |
|---|---|---|
| Hardware requirement | RAID controller | None |
| Drive mixing | Limited | Flexible |
| Management interface | BIOS/separate tool | Windows Settings |
| Expandability | Complex | Simple |
Creating a Storage Pool With Multiple Drives
To get started, open to Windows 11 Settings: System > Storage > Advanced storage settings > Storage Spaces. Click “Create a new pool and storage space”.
Windows will show you the available drives you can use use for a new pool. Pick the ones you want, but keep in mind: creating a pool wipes all data from those drives, so back up anything you care about first.
Once you’ve chosen your drives, give your pool a name and start configuring. The pool combines all selected drives into a single chunk of storage. You can add more drives to this pool later—no need to reformat or shuffle data around.
Requirements for creating a storage pool:
- At least two drives (for redundancy)
- Drives should be formatted or unallocated
- Admin rights on Windows 11
- Enough space for your chosen resiliency
Selecting the Right Resiliency: Mirror, Parity, and More
Storage Spaces protects your data through its resiliency feature when a drive fails. The different options between protection and available storage space exist in each configuration.
The two-way mirror system duplicates your data across two drives in the same way RAID 1 operates. The system requires two drives for operation. The system maintains data availability when one drive fails because it duplicates data across two drives.
The three-way mirror system protects data by distributing it across three drives for enhanced security. The system requires three drives to operate while providing users with one-third of the total storage capacity. Your data remains accessible when two drives simultaneously experience failure.
Parity is similar to RAID 5, spreading data and parity info across three or more drives. This gives you more usable space—about two-thirds of the total—while still protecting against single drive failure.
| Resiliency Type | Minimum Drives | Usable Capacity | Drive Failures Tolerated | Best For |
|---|---|---|---|---|
| Simple (no protection) | 1 | 100% | 0 | Maximum space, no redundancy |
| Two-way mirror | 2 | 50% | 1 | Critical data, faster performance |
| Three-way mirror | 3 | 33% | 2 | Maximum data protection |
| Parity | 3 | ~67% | 1 | Balanced capacity and protection |
Your choice of resiliency depends on your data protection needs and the number of drives you operate. Mirroring provides faster performance for regular usage but parity technology optimizes storage capacity for infrequently accessed data.
Transforming Old Hard Drives Into External Storage Solutions
Turning old hard drives and SSDs into external storage is a smart way to expand your capacity. You’ll prep the drives, pick the right enclosures, and set everything up in Windows 11 Storage Spaces for a backup system that barely costs anything.
Removing and Preparing Hard Drives for Enclosures
To get started, safely remove the hard drive from its old home. Power everything down, unplug cables, and if you’re working inside a PC, ground yourself to avoid static.
SATA drives have an L-shaped connector. NVMe SSDs use the M.2 slot. Make sure you know which is which. Also, check the size—2.5-inch drives are for laptops, 3.5-inch are for desktops.
Look over the drive for any obvious issues like broken connectors or corrosion. Blow off dust with compressed air. Don’t worry about formatting yet—Windows will handle that when you add the drive to a pool.
Choosing and Installing a Hard Drive Enclosure
Pick an enclosure that fits your drive’s size and connector. Tool-free cases are nice—they snap together, no screwdriver needed. For 2.5-inch SATA drives or SSDs, USB 3.0 enclosures can hit 5 Gbps. NVMe SSDs need USB-C enclosures for the best speeds, up to 10 Gbps.
| Drive Type | Enclosure Interface | Maximum Speed | Installation Method |
|---|---|---|---|
| 2.5″ SATA | USB 3.0 | 5 Gbps | Tool-free slide |
| 3.5″ SATA | USB 3.0 | 5 Gbps | Screw or tool-free |
| M.2 NVMe | USB-C | 10 Gbps | Tool-free slide |
Open up the enclosure—usually it’s just a slide or a latch. Line up the drive’s connector and slide it in until it clicks. Close it up and plug the enclosure into your PC’s USB port. Windows should see it right away, and you’ll spot it in Disk Management.
Adding Drives to Storage Pools for Expanded Capacity
Fire up Windows Disk Management (Windows + X, then pick it from the menu). Your new drive should show up as unallocated. Search for Storage Spaces in the Start menu to get started.
Click “Create a new pool and storage space.” Windows will list all available drives—pick the ones you want to pool. Just double-check you’ve backed up anything important, because this wipes the drives.
Once your pool is set up, you can add more disks later if you need to grow. Choose your resiliency: simple (no backup), mirror (duplicate data), or parity (efficient but protected). Windows will assign a drive letter, but you can always change it in Disk Management. The virtual drives from Storage Spaces act just like regular volumes, so you can access and manage them as usual.
In Summary
Windows 11 Storage Spaces provides users with a built-in operating system solution to protect their family photos and create home servers and enhance their current hard drive capabilities. The solution provides home users and small businesses with a perfect combination of functionality and user-friendly interface despite lacking advanced features of enterprise-grade solutions. Thanks for reading!
Frequently Asked Questions
What is Storage Spaces in Windows 11?
Storage Spaces is a built-in Windows 11 feature that allows you to combine multiple physical drives into a single virtual disk called a storage pool. This helps protect your data from drive failures and allows you to expand storage over time as you add more drives to your PC.
What are the main benefits of using Storage Spaces?
The key benefits include:
- Data protection: Protects against drive failures through redundancy options
- Scalability: Easily expand storage by adding more drives to the pool
- Flexibility: Create virtual drives with different resilience and performance characteristics
- Optimization: Efficiently manage storage across multiple physical drives
What types of Storage Spaces can I create?
Windows 11 offers several resilience types:
- Simple (no resilience): Combines drives for maximum capacity but no protection
- Two-way mirror: Stores two copies of data, protecting against single drive failure
- Three-way mirror: Stores three copies of data, protecting against two simultaneous drive failures
- Parity: Provides protection with more efficient space usage, though with slower write performance
