I bought my Dell XPS 9500 back in 2020 to replace my aging all-in-one XPS 2720. It has been a wonderful desktop replacement. I decided to upgrade the original 16 GB of RAM that came with the laptop with 32GB of Corsair Vengeance SODIMM DDR4 RAM (2x16GB) at 3200MHz and was pleasantly surprised with the performance increase. Since upgrading I have noticed significant improvements. Anyone looking for a performance boost to their laptop should consider the Corsair Vengeance DDR4 3200MHz SODIMM.
Dell XPS 15 9500 RAM Upgrade
The upgradability of the Dell XPS 9500 enabled me to get a nice performance boost despite my laptop being 4 years old. Upgrading to 32GB RAM delivered a noticeable benefit in productivity and multi tasking since I was able to open more application windows and browser windows. My video editing software seemed to not only render videos a little more quickly but also didn’t impact other windows open while I was waiting for rendering to finish.

- 32GB (2x16GB) DDR4 SODIMM kit for 8th Generation or newer Intel Core i7, and AMD Ryzen 4000 Series notebooks
- Auto-overclocking with compatible notebooks (no BIOS configuration required)
- 22-22-22-53 latency
The Dell XPS 15 9500 supports CORSAIR Vengeance SODIMM DDR4 RAM (2x16GB) running at 3200MHz. The laptop uses this specific memory speed while benefiting from dual-channel configuration. These particular modules operate at CL22 timings to achieve maximum performance.
Before upgrading to high performance RAM like this you need to double check compatibility with your laptop. You will be extremely frustrated when you open your laptop to install new memory only to discover nothing happens after turning it back on. Older laptops may not the higher performance capabilities so always check before purchasing. Vendors like Crucial and even Amazon have tools to check compatibility of your laptop model.

Step-by-Step Upgrade Process
The process for upgrading the RAM in your Dell XPS 9500 requires careful preparation and execution. The procedure consists of multiple steps including workspace preparation and laptop case opening alongside memory module removal and CORSAIR Vengeance SODIMM installation.
Required Tools and Precautions
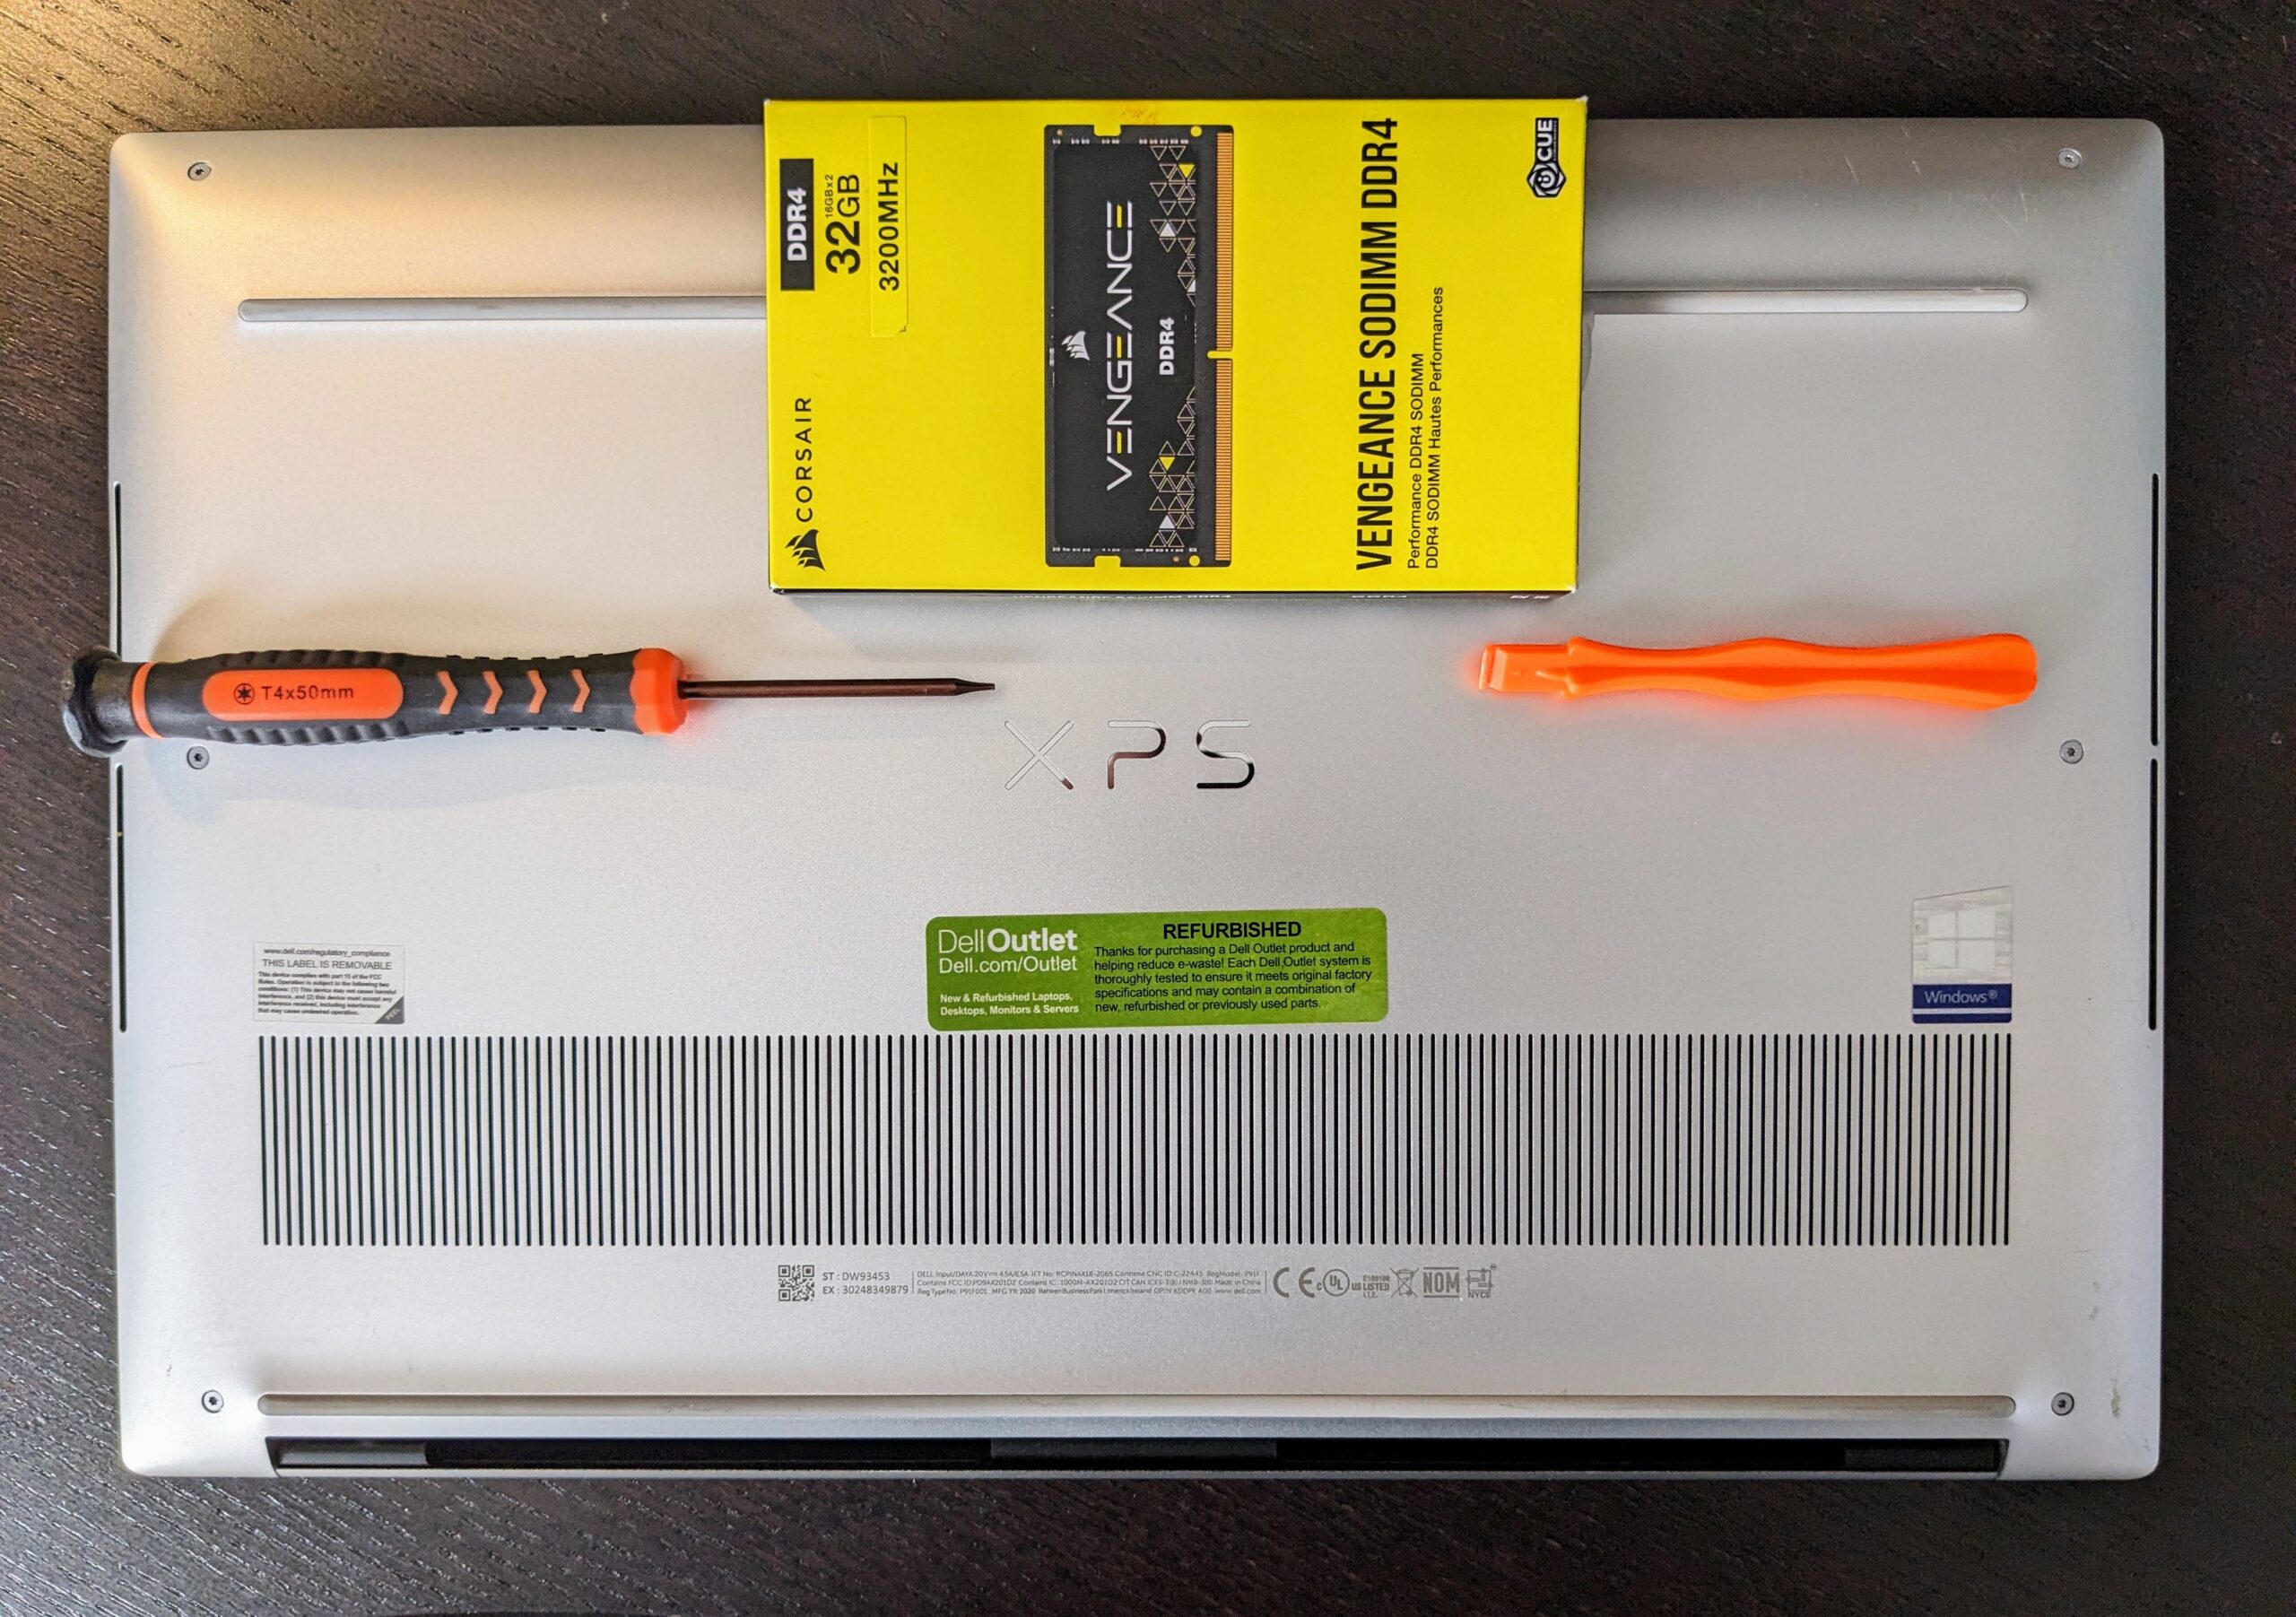
- Setup what you need before starting. The upgrade needs a small torx head screwdriver (size #00 or #0) along with a plastic pry tool or guitar pick.
- Use a surface that is clean and non-conductive like a wooden table or an anti-static mat.
- Power off laptop completely and disconnect the power.
- Use a magnetic tray or organized compartments to keep track of all screws.
 Opening the Laptop Case
- Flip the laptop over to remove the screws. The back panel is one whole piece.
- Start by removing the visible screws from the bottom panel
- Carefully insert a plastic pry tool or similar thin piece of hard plastic into the seam between the bottom panel and laptop body
- Begin at a corner and work your way along the edges. You should see a gap start to open. I found slightly rotating or gently twisting the pry tool helps.
 Replacing the Factory Installed RAM
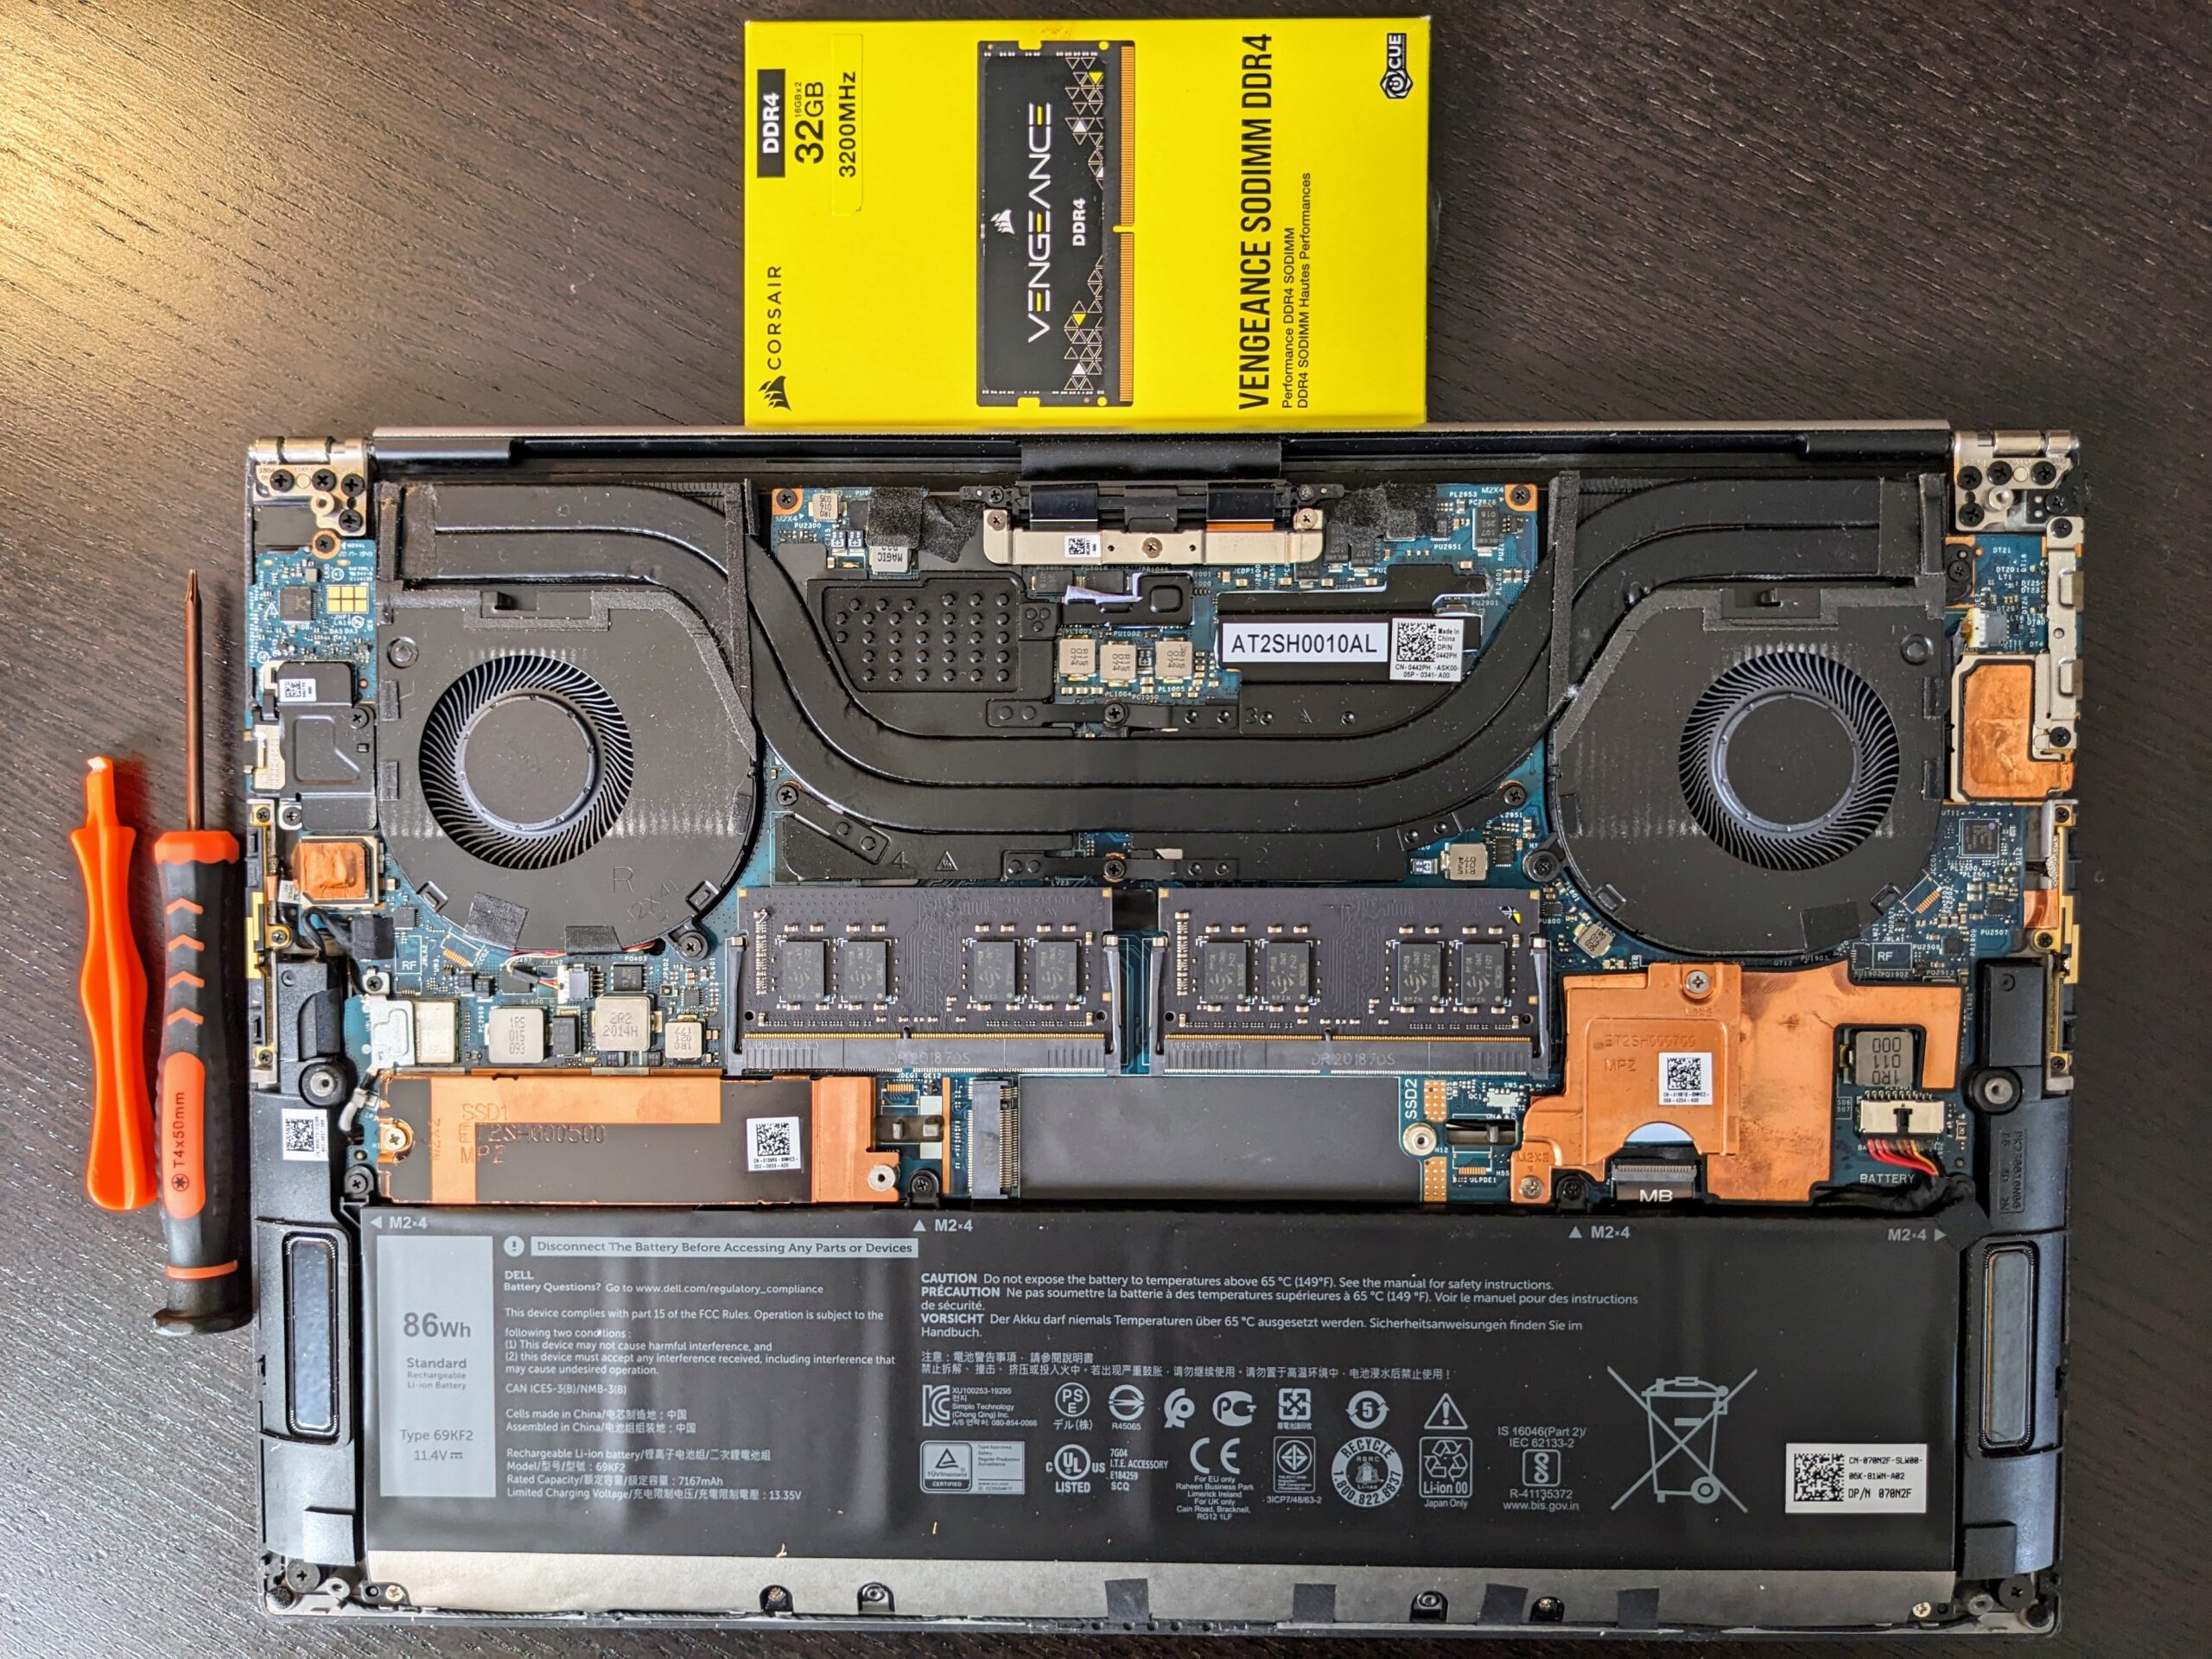
- The factory-installed 16GB RAM (2x8GB modules) rests within the SODIMM slot using tension clips on both sides. Spread these clips outward with your fingers. The RAM stick becomes accessible at an angle when the tension is released.
- Remove each module from its slot while holding it by its edges and try to avoid touching the gold connectors.
Installing the New CORSAIR Vengeance Modules
- The CORSAIR Vengeance SODIMM DDR4 RAM modules (2x16GB) need proper orientation before being installed.
- Insert the RAM into the slot at an angle while applying pressure evenly as it goes in.
- Push the module down until the tension clips lock into place to create a secure connection.
- Repeat the step for the 2nd RAM module
Reassembling the Laptop
- Visually inspect that everything is inserted properly and lying down flat without having to push on anything.
- Putting the back panel back on is much easier than removing it. Line up the corners and edges and gently push around the back cover.
- Once everything appears to be lined up and snug start replacing all the screws. Do not over tighten.
- Now it’s safe to turn it back on.
Post-Upgrade

- After installing your CORSAIR Vengeance RAM kit into your laptop, do not be surprised upon rebooting if you receive a bios notification about the system memory change.
- Just acknowledge alert and your laptop should proceed to load Windows.
- Open Windows Task Manager and click on the Performance tab to confirm that Windows recognizes the new RAM allocation.
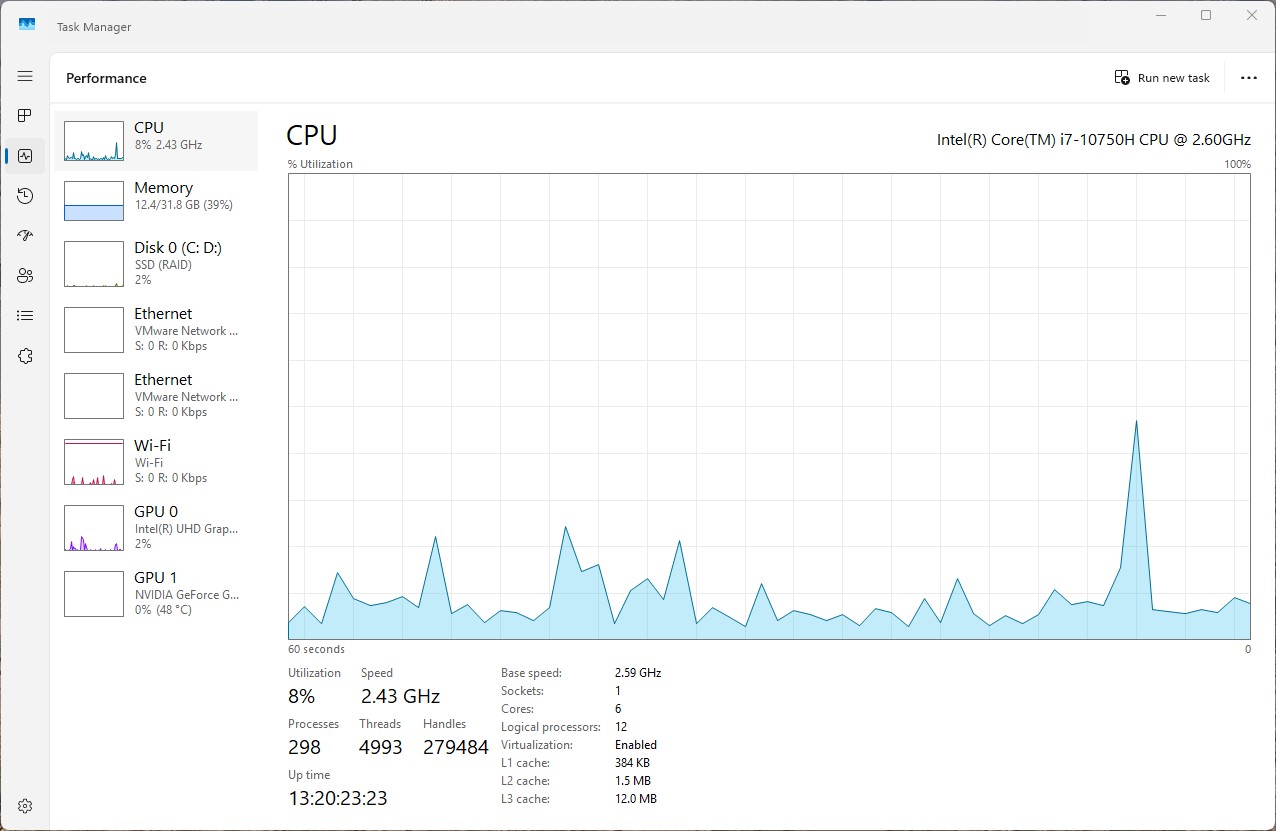
Naturally you should pay attention to system behavior after the upgrade days for any unexpected events such as blue screens or application crashes or random restarts. Memory compatibility problems may cause these issues which need further investigation.
BIOS updates can resolve RAM problems which appear as hardware faults. Perform a BIOS update as your first troubleshooting action whenever you experience stability problems.
Understanding RAM Compatibility: A Important Caveat
Before upgrading your laptop memory be sure to understand compatibility factors beyond size (GB) and form factor.
The installation of incompatible memory will prevent your laptop from booting or cause stability problems. Pay particular attention to:
- Frequency/Speed (MHz): Your laptop operates with specific memory speeds which you need to check. Installing RAM with a higher speed than your system supports will not boost performance but may lead to system instability.
- Dual Channel Operation: RAM performance is best when installed in matching pairs. The combination of different memory sizes with different brands or specifications will force your system to operate in single-channel mode which reduces performance.
- Latency/Timing: The CAS latency along with other timing specifications determine how fast your RAM will respond to requests. Memory with incompatible timing specifications will either cause system crashes or prevent the system from booting.
- Voltage Requirements: The RAM requires specific voltage levels which your laptop may not support thus endangering both memory and system components.
Check your laptop manual or manufacturer website for exact compatibility specifications before buying new RAM.
Frequently Asked Questions
Many Dell XPS 9500 15 owners have asked about the possibility of upgrading RAM. The following covers the most frequent questions about compatibility, installation process and performance gains from using 32GB with Corsair Vengeance modules.
How much RAM can the Dell XPS 15 9500 be upgraded to?
The Dell XPS 15 9500 supports up to 64GB of RAM. This is done by using two 32GB DDR4 SODIMM sticks in the laptop’s two RAM slots.
The system operates in dual channel memory mode so it is recommended to install two identical RAM modules for better performance.
How to correctly replace the RAM on the Dell XPS 15 9500?
To install new RAM in the XPS 15 9500, first unplug the laptop and switch it off. Open the bottom panel by removing the 10 Torx screws.
Once inside, locate the RAM slots. They are usually located near the middle of the motherboard. If you are replacing the existing modules, just push the side clips to release the old RAM.
The new Corsair Vengeance modules are to be inserted at a 45-degree angle and then pressed down until they click in place. After that, reassemble the laptop and turn it on to check if the upgrade was successful.
What kind of RAM modules are compatible with the Dell XPS 15 9500?
The XPS 15 9500 has DDR4 SODIMM modules with speeds of 3200MHz. The Corsair Vengeance modules are perfectly compatible with these specifications.
RAM that should work has CL22 timings, although the system may automatically adjust the timings based on its abilities. The voltage requirements are usually 1.2V for DDR4 modules.
The physical dimensions should be standard SODIMM dimensions to fit in the memory slots of the laptop.
Can the Dell XPS 15 9500 be upgraded with 64GB of RAM?
Yes, the Dell XPS 15 9500 is fully capable of handling up to 64GB of RAM. Search results indicate that many users have successfully upgraded to 64GB with two 32GB modules.
Both Crucial and Corsair sell compatible 32GB x2 kits that are specifically designed for and tested on the XPS 15 9500. The motherboard design is officially certified for this maximum capacity.
The specifications of the product from Dell confirm this possibility, although the standard factory configurations usually have lower capacities.
What are the performance advantages of increasing the RAM of the Dell XPS 15 9500 from 16GB to 32GB?
Increasing the RAM from 16GB to 32GB provides tremendous performance boost for running many programs at the same time and for applications that use a lot of memory. Users will experience less lag when running multiple applications at the same time.
Creative applications like video editing software, virtual machines, design programs etc. gain a lot from the additional memory. These applications can store more data in the RAM instead of storing it in the slower storage.
Browsing with multiple tabs open is more fluid, and system lag during intense usage is greatly decreased.
Are there any possible issues or warranty issues with upgrading the RAM by the user on a Dell XPS 15 9500?
XPS models from Dell usually do not void the warranty if the user decides to upgrade the RAM. Any damage that may be caused during the installation will not be covered.
If warranty issues are a concern, I suggest checking out Dell’s documentation or support before attempting to upgrade. Some areas may have different policies as for user modifications.
In Summary
Upgrading the RAM of my XPS 15 9500 laptop was a straight forward process. The Corsair Vengence DDR4 3200 MHZ RAM provided a nice performance boost. Aside from picking the best compatible RAM within my budget, the biggest challenge was getting the back cover to come off without damaging anything. Always check RAM compatibility with your specific laptop model before purchasing to avoid any issues. Thanks for reading!
