
Never get rid of a laptop or USB drive without first deleting your personal data off the device. However, deleting files and even emptying the Recycle Bin doesn’t prevent someone from recovering the files on your laptop. This is because, in most cases, the operating system just deletes pointers to the data. They are just marked safe to overwrite and they stay there until new data overwrites them. The files themselves are not removed from the hard drive. This mechanism is by design and it is how file recovery programs are able to work when you accidentally delete something and try to restore it.
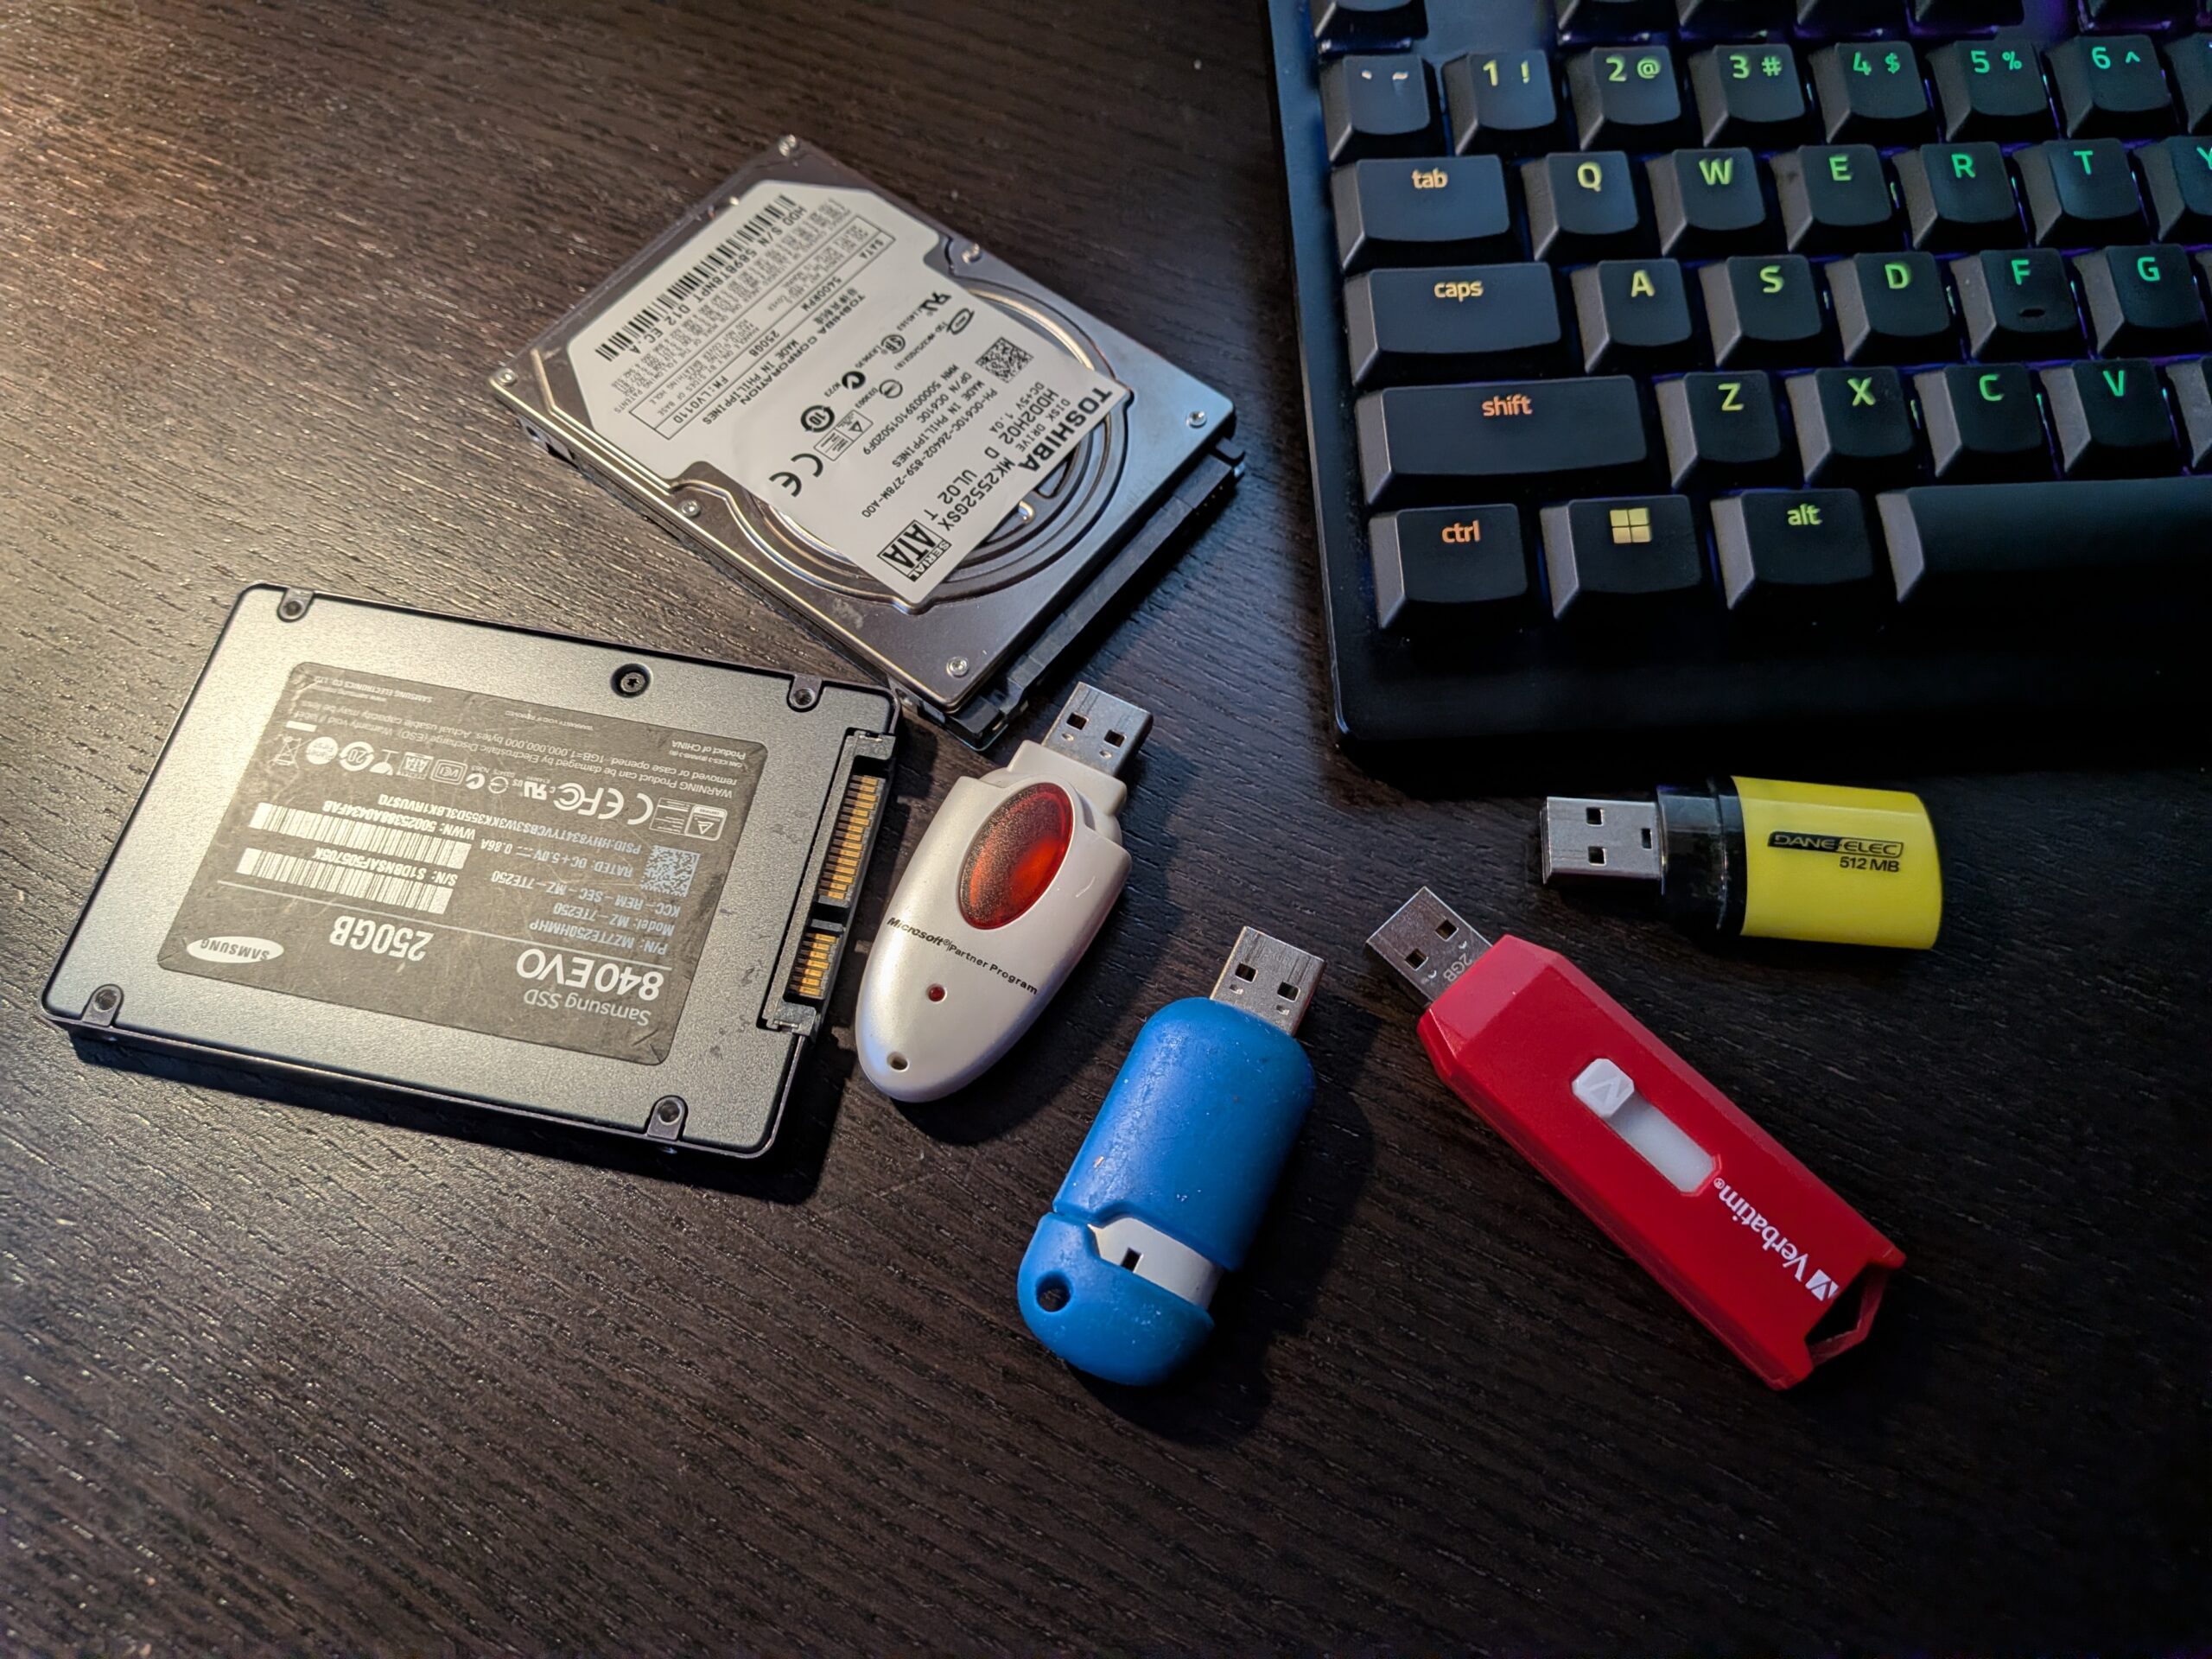
Accurately removing files from a hard drive ultimately depends on what kind of drive you have. A mechanical hard drive (HDD) can be safely wiped using a free tool like Shred OS, to write over all the sectors on the drive. However, an SSD cannot really be fully wiped by writing over the sectors. Because of this, to fully wipe an SSD, a command has to be sent to the firmware to remove all the data. With an SSD you need to use the vendor’s secure erase tool like Samsung Magician.
And this creates another challenge if you’re trying to sell the laptop. Samsung Magician Secure Erase will remove all the partitions on the hard drive including the Windows Recovery partition so it’s critical to prepare Windows Recovery media before starting
Why not just format the drive?
While quick formatting may seem like the easy route, it doesn’t actually erase data like a regular format does. A quick format removes the file system, which tells the computer where files are located. A quick format really isn’t a format at all. Data that’s removed by a quick format can be restored with data recovery software.
It goes without saying but know which drive contains the data you want to erase. The worst thing a user can do with this utility is erase the only copy of important data, or erase the wrong drive.
The Logical Nature of Deleting and Formatting Files
When a file is deleted, it is removed from the file allocation table. The file system still indicates that space is available for new data. The deleted file still physically exists on the hard drive.
Formatting a drive is like deleting a file. A quick format erases file system structures and keeps data intact. A full format, or zero-fill format, erases data on mechanical HDDs. On SSDs, quick and full formats aren’t reliable as firmware-level commands like Secure Erase, Sanitize and Cryptographic Erase commands are required.
| Action | What it changes | Recoverable? |
|---|---|---|
| Delete / empty recycle bin | File system pointers only | Yes, easily |
| Quick format | File system table and root folder | Yes |
| Full format (NTFS, FAT32, exFAT) | Writes zeros across all sectors | No, on an HDD |
| Nwipe overwrite pass | Every addressable sector | No, on an HDD |
| ATA Secure Erase / NVMe Sanitize | Firmware clears all flash blocks | No |
Identify Whether the Laptop Has an HDD or SSD
To properly erase your laptop for resale or disposal, you first have to figure out what kind of hard drive is in it.
A good starting point is to take note of your laptop’s age and thickness. A thin, razor-like laptop is recent and most likely uses an NVMe SSD. A thicker, heavier laptop is probably using a traditional Hard Disk Drive (HDD).
Here is how to check for sure:
- On Windows: There are a few different ways to check. First, you can open Task Manager (Ctrl + Shift + Esc), click the Performance tab, select the disk from the left, and Windows will tell you what type it is. You can also open the Start menu, type Defragment and Optimize Drives, and look at the Media Type column.
- On Mac: Click the Apple menu and select About This Mac. From here, click Storage. ( On newer Macs, click More Info > System Report > Storage to see exact Flash information.)
What to do before you start
Here’s an essential checklist for backing up Data before using an erasure tool.
- Make a backup and test it. Don’t just verify that the files exist. Open some files after backup to make sure they are valid.
- Make a note of the model and capacity of your disk in Device Manager/ Disk Management. This is to cross check against what the wipe tool shows you.
- Unplug everything that you don’t want erased (Memory cards, external HDDs, phone USB, etc.)
- Turn off your computer’s sleep mode and make sure it’s plugged into a power source.
- Sign out of any applications. Disable/ Uninstall protected programs.
Using the note you made for model and capacity of the disk drive is more useful than it seems. Wipe tools identify disks by their device paths and model strings. A laptop with an internal drive and an external drive plugged in shows up as two disks.
In case you are moving files to a new machine first, cloning the partitions with Macrium Reflect is a better way to go (especially with limited space on a laptop) and an NVMe enclosure would do the same over USB.
When Reset This PC Is Good Enough and When It Is Not
For the majority of laptop sales on a marketplace, using ‘Reset this PC’ with the options to ‘Remove everything’ and to ‘Clear data’ is adequate. Utilizing this method ensures the prospective buyer is left with a functional Windows environment. The process that Microsoft employs to reset a PC, reinstall Windows, and ultimately wipe the hard drive. However, I still prefer to the extra step to completely erase my data from a laptop and then reinstall Windows, before handing it over to someone else.
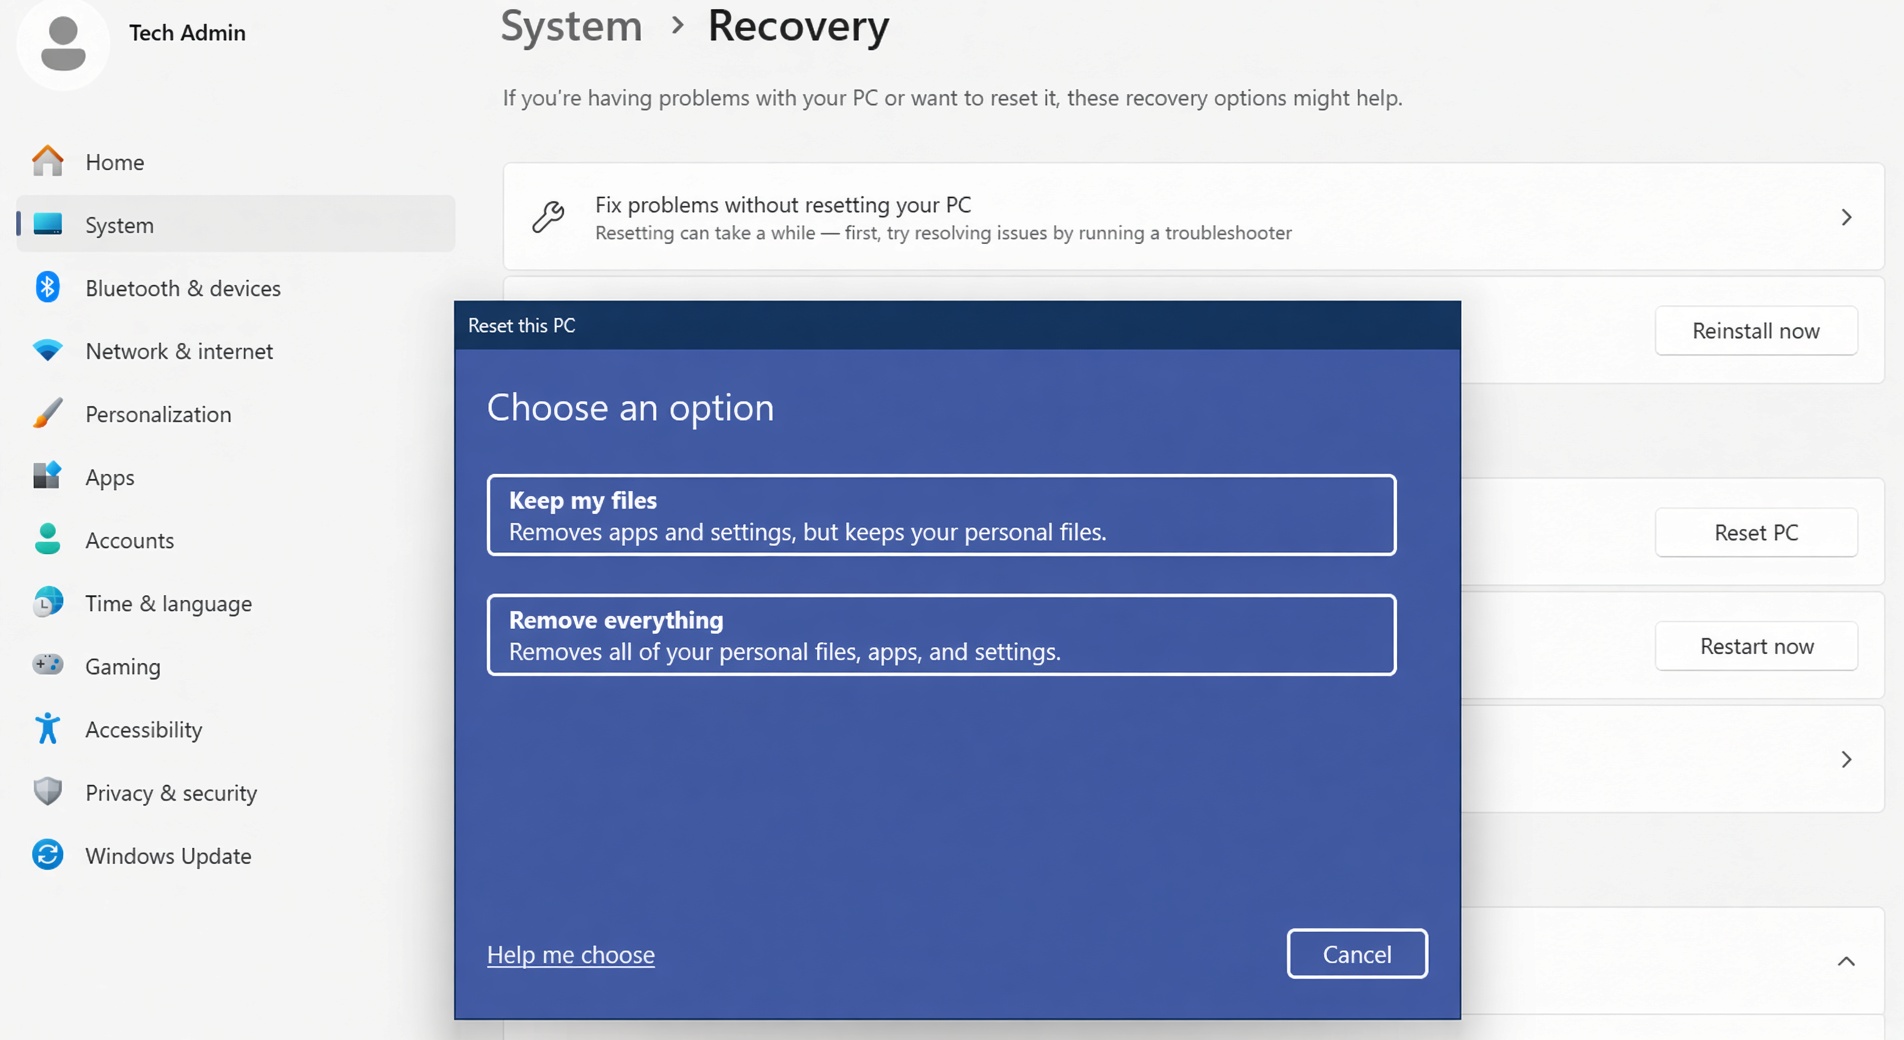
There are some scenarios in which this process is not enough. If the recovery partition is damaged, a reset will not be successful. A reset will also not be successful if the hard drive is encrypted by a key that is not controlled by the user performing the reset. In addition, performing a reset on a computer will not issue an erasure certificate, which may be required for work related computers.
Which Standards Matter for Personal Sales and Regulated Disposal?
NIST SP 800-88 Rev. 2 and IEEE 2883-2022 describe the industry best practices for media sanitization. They distinguish three levels of sanitization:
- Clear: Overwrite user-accessible data with standard read/write commands
- Purge: Utilize commands issued by the drive’s firmware (i.e. ATA Secure Erase, NVMe Sanitize, or Cryptographic Erase)
- Destroy: Physically destroy the media
In the case of the majority of private laptop sales, “Clear” sanitization of a mechanical HDD is sufficient and “Purge” sanitization of an SSD would suffice.
The requirement to perform multiple overwrite passes of a HDD to meet the DoD 5220.22-M standards have been waived by the DoD, and offer no additional security with respect to data stored on media today. In fact, multiple overwrite passes may increase the sanitization time unnecessarily, and reduce the lifespan of an SSD.
When sanitizing an SSD, overwriting should not be relied on. The SSD’s built-in Secure Erase/Sanitize command, or a Cryptographic Erase should be used instead.
If data in the drive contains regulated information (ex. Patient health information, or other financially sensitive data), you would also need to provide evidence to support the sanitization, and retain documentation of the process.
Use the Best Method for the Drive Sanitation
Drives need to be wiped before they are sold or given away. The method for wiping the drive is dependent on the type of drive and the situation for the drive after it has been wiped. For a mechanical HDD I like to use Shred OS. However, for SSD perform a factory reset using official vendor on the laptop and disable the load settings in Windows.
Create a ShredOS Bootable USB With Rufus for an HDD
ShredOS is a small Linux based application that is used to fully format hard drives. Using a bootable USB allows the user to format the hard drive even if the hard drive is in use. You only need at least 1 GB of storage on a USB drive to create a bootable image with the ShredOS ISO usingthe free tool called Rufus.
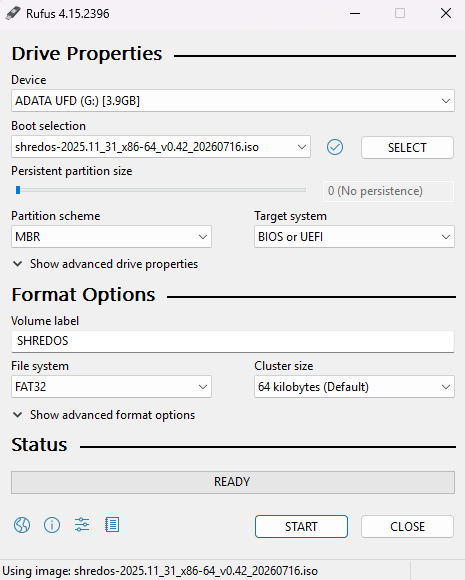
You will need to format your USB drive to do this. Everything on the USB drive will be erased.
- Download Shred OS .iso file from GitHub.
- Download Rufus and follow the prompts to create a bootable USB for ShredOS.
- Select your USB drive from the list under the “Device” header and click the button next to the header to select the ShredOS ISO file.
- Click the button that says “Start” to begin.
- Leave the settings on the next window as they are and click “OK.”
- Remove the USB drive from your computer.
- The program will finish formatting the USB drive and eject it. You may label the USB drive to distinguish it from other data USB drives.
Boot the Laptop From the Shred OS USB and Run Nwipe Safely
Nwipe is the core component of ShredOS that is responsible for carrying out the disk wiping function. Nwipe supports USB integration, and as such, can be used for disk wiping on a variety of systems, including PCs.
Once you have booted into the ShredOS environment, you will need to identify all the disk drives connected to the system. Depending on the model of your system, you may need to press F9, F10, F12, or Esc to open the BIOS settings and disable Secure Boot.
You will need to find the model and disk capacity of each disk drive. ShredOS will then allow you to wipe selected disk drives.
You can select a disk drive by pressing the space bar. You will know that a disk drive has been selected if it is shown as [wipe].
You will be given a list of methods to choose from. To wipe a disk drive using the Zero Fill method, which writes zeros to all sectors on a disk drive, select the method and start the process.
You can choose to turn on verification, which will allow Nwipe to check if the disk has been wiped. Verification will increase the time it takes to complete the wiping process. Once you are finished, remove the USB from the system.
Sanitize an SSD With Secure Erase, NVMe Sanitize, or Cryptographic Erase
Overwriting an SSD wastes write endurance and frequently fails to touch data stored in over-provisioned spare blocks. The correct approach is to issue the drive’s own firmware sanitization commands instead.
On SATA SSDs, ATA Secure Erase (or Enhanced Secure Erase) instructs the controller to reset every flash cell, including spare area. On NVMe drives, the equivalent operations are the NVMe Sanitize command or an NVMe Format with a secure erase setting.
Cryptographic erase is the fastest of the three when the drive supports it. Self-encrypting drives (SEDs) store all data encrypted at all times; discarding the media encryption key renders every block unreadable in seconds.
Manufacturer utilities are the safest way to issue these commands, because they are written for the specific drive. Bootable tools such as Parted Magic also expose ATA Secure Erase and NVMe Sanitize on a wide range of hardware.
Our walkthrough on securely erasing hard drives covers the exact command sequence, and the secure erase archive collects related notes.
One caution: do not interrupt a Secure Erase. Power loss mid-command can leave the drive in a frozen or locked state that requires a specific power-cycle recovery procedure.
If the SSD was encrypted with BitLocker or FileVault from the moment data was first written, deleting the volume and its key already reaches the NIST Purge tier.
Reset Windows Before Handing Over a Working Laptop
If the buyer expects a laptop that boots, you need to run Reset This PC with Clean data. For Windows 11, go to Settings > System > Recovery > Reset PC. For Windows 10, go to Settings > Update & Security > Recovery > Get started.
Choose Remove everything, then Local reinstall or Cloud reinstall, which is useful if the local Windows files are damaged.
Go to Change settings under Additional settings and turn Clean data to Yes. Dell suggests Remove files and clean the drive.
Microsoft says the clean data option can take a few hours. Confirm and click Next to start the process.
Once Reset is complete, you will need to turn off the laptop before it starts the out-of-box experience. Some Microsoft support forums show users tying their account to a computer during the out-of-box experience by mistake.
Erase a Mac With Disk Utility or a Mac Factory Reset
If you are using a Mac with Apple Silicon or a T2 Chip, go to the Apple Menu > System Settings > General > Transfer or Reset > Erase All Content and Settings. Select your Mac and choose Continue to erase the drive.
If you do not have a Mac with Apple Silicon or a T2 Chip, you can use Disk Utility to erase your Mac. To do this, restart your computer with Command + R to open Utilities, select Disk Utility, and erase Macintosh HD in the Internal section and select APFS as the format.
You can turn on FileVault before erasing your Mac, which will make the remaining data on your drive unreadable, which is discussed in the Norton’s Mac Wipe pages.
If you need to erase your Mac for any reason, sign out of iCloud, and turn off Find My to disable Activation Lock for the buyer.
When Physical Destruction or a Certified Service Is the Safer Choice
CDRs can be physically erased by a certified service or by physical destruction. The same goes for SSDs.
There are some disks that you can’t erase. A disk that can’t be spun up cannot be erased. The same goes for disks that enumarate in BIOS but throw read errors during the boot process. These disks can still have data on their platters.
Physical destruction is the only sure fire way of removing that data. Making several holes through the platters (degaussing) or drilling through the platters would work as well.
An SSD can be broken the same way as a HDD. Breaking the circuit board won’t do anything. Replacing the drive with an SSD would be a good alternative.
You can always get a certified service to do it for you. NIST SP 800-88 promotes vendors who provide a certificate of destruction. Paperwork like that is what auditors ask for and it is cheaper than having to explain an incident to them.
Final Thoughts
You can’t rely on “delete” and “empty Recycle Bin” to erase data on a laptop or drive before handing it off to someone else. With those commands, the data on your laptop is technically still recoverable. With HDDs and SSDs, the right way to wipe the drive before handing it off depends on what kind of drive it is. With HDDs, you can use applications like ShredOS or Nwipe. With SSDs, the right way to wipe it is by using a command like Samsung Magician, ATA Secure Erase, NVMe Sanitize, or a similar command issued through the manufacturer’s tool or a reliable bootable utility. With SSDs, Quick Formats and Full Formats aren’t reliable ways to wipe data. With all drives, you should unplug peripherals and check to make sure you’re erasing the right drive.
For personal marketplace sales, if data is sensitive or regulated, you should have the drive physically destroyed or use a service that provides physical destruction. If you sell an laptop and use the “Reset this PC” command in Windows and select “Remove everything” and “Clean data,” you’re leaving the device in a better selling state and reduce data recovery risk. The data is still recoverable if the device is sent for service.
Frequently Asked Questions
How can I completely clear my hard drive before giving away my laptop?
Identify if the laptop has an HDD or an SSD (Task Manager → Performance tab, or the Media Type column in Optimize Drives).
- HDD: Create a ShredOS USB and run Nwipe to overwrite the drive.
- SSD: Use the manufacturer’s secure-erase tool (or a reliable utility that supports ATA Secure Erase, NVMe Sanitize, or cryptographic erase). Normal overwriting is not recommended for SSDs.
Prior to doing anything: back up anything you need (and make sure the back up is good); unplug any other storage devices; plug laptop into AC power; disable sleep mode. Once it’s done, turn off the laptop.
Will deleting or formatting a drive erase the data so I can sell it?
No. Deleting files or empting the recycle bin only removes pointers; the data is usually still recoverable until that data is overwritten by new data. A quick format only clears the directory structures; the data is still there. A full format that writes zeros to a drive is the only reliable way to erase data from an HDD. A secure erase from the firmware is the only reliable way to erase data from an SSD.
Can ShredOS be used to erase an SSD?
Yes, ShredOS can erase SSDs, but it is not the best method. Overwriting an SSD wastes write endurance and fails to erase over-provisioned spare blocks. Use the drive’s Secure Erase / Sanitize command or use a cryptographic erase instead.
What are some ways to erase a hard drive without using Windows?
A ShredOS USB can be created using Rufus on another computer. The USB can then be booted on the laptop and Nwipe can be run to erase the hard drive.
You may need to enter the boot menu (F12 on many Dells and Lenovos, Esc/F10/F9 on others) and temporarily turn off Secure Boot. Be sure to match the disk model and capacity in ShredOS to the drive you want to erase.
Is it safe to assume that data on the hard drive is removed when the hard drive is physically removed from the computer?
No, data is not removed when a hard drive is physically removed from a computer. The data will remain on the hard drive, and any person that puts the hard drive in another computer can read it. Securely erase the hard drive, or just sell the laptop without the hard drive if you wish to keep the data private.
Is it better to physically destroy the hard drive?
If the hard drive is completely dead and will not spin up, physical destruction is the only way to ensure the data is completely unrecoverable.
If the hard drive is still healthy, and can still be read, a secure erase or other hard drive sanitization method should be sufficient for a hard drive sale. Physical destruction (or a certified hard drive destruction service) of the hard drive should be sufficient if the data is extremely sensitive, regulated, or if you wish to be completely certain that the data is completely unrecoverable.


